
用于创建VM克隆的REST API工作正常,但是在VM克隆之后。它处于脱离状态。
有什么方法可以通过API 3在状态下设置权力(在API 2中,它在那里,但它的旧且弃用不起作用)
或者
创建VM或克隆的任何其他方法,以便在VM创建后它可以在状态下掌权。
最好的答案Anishwalia20
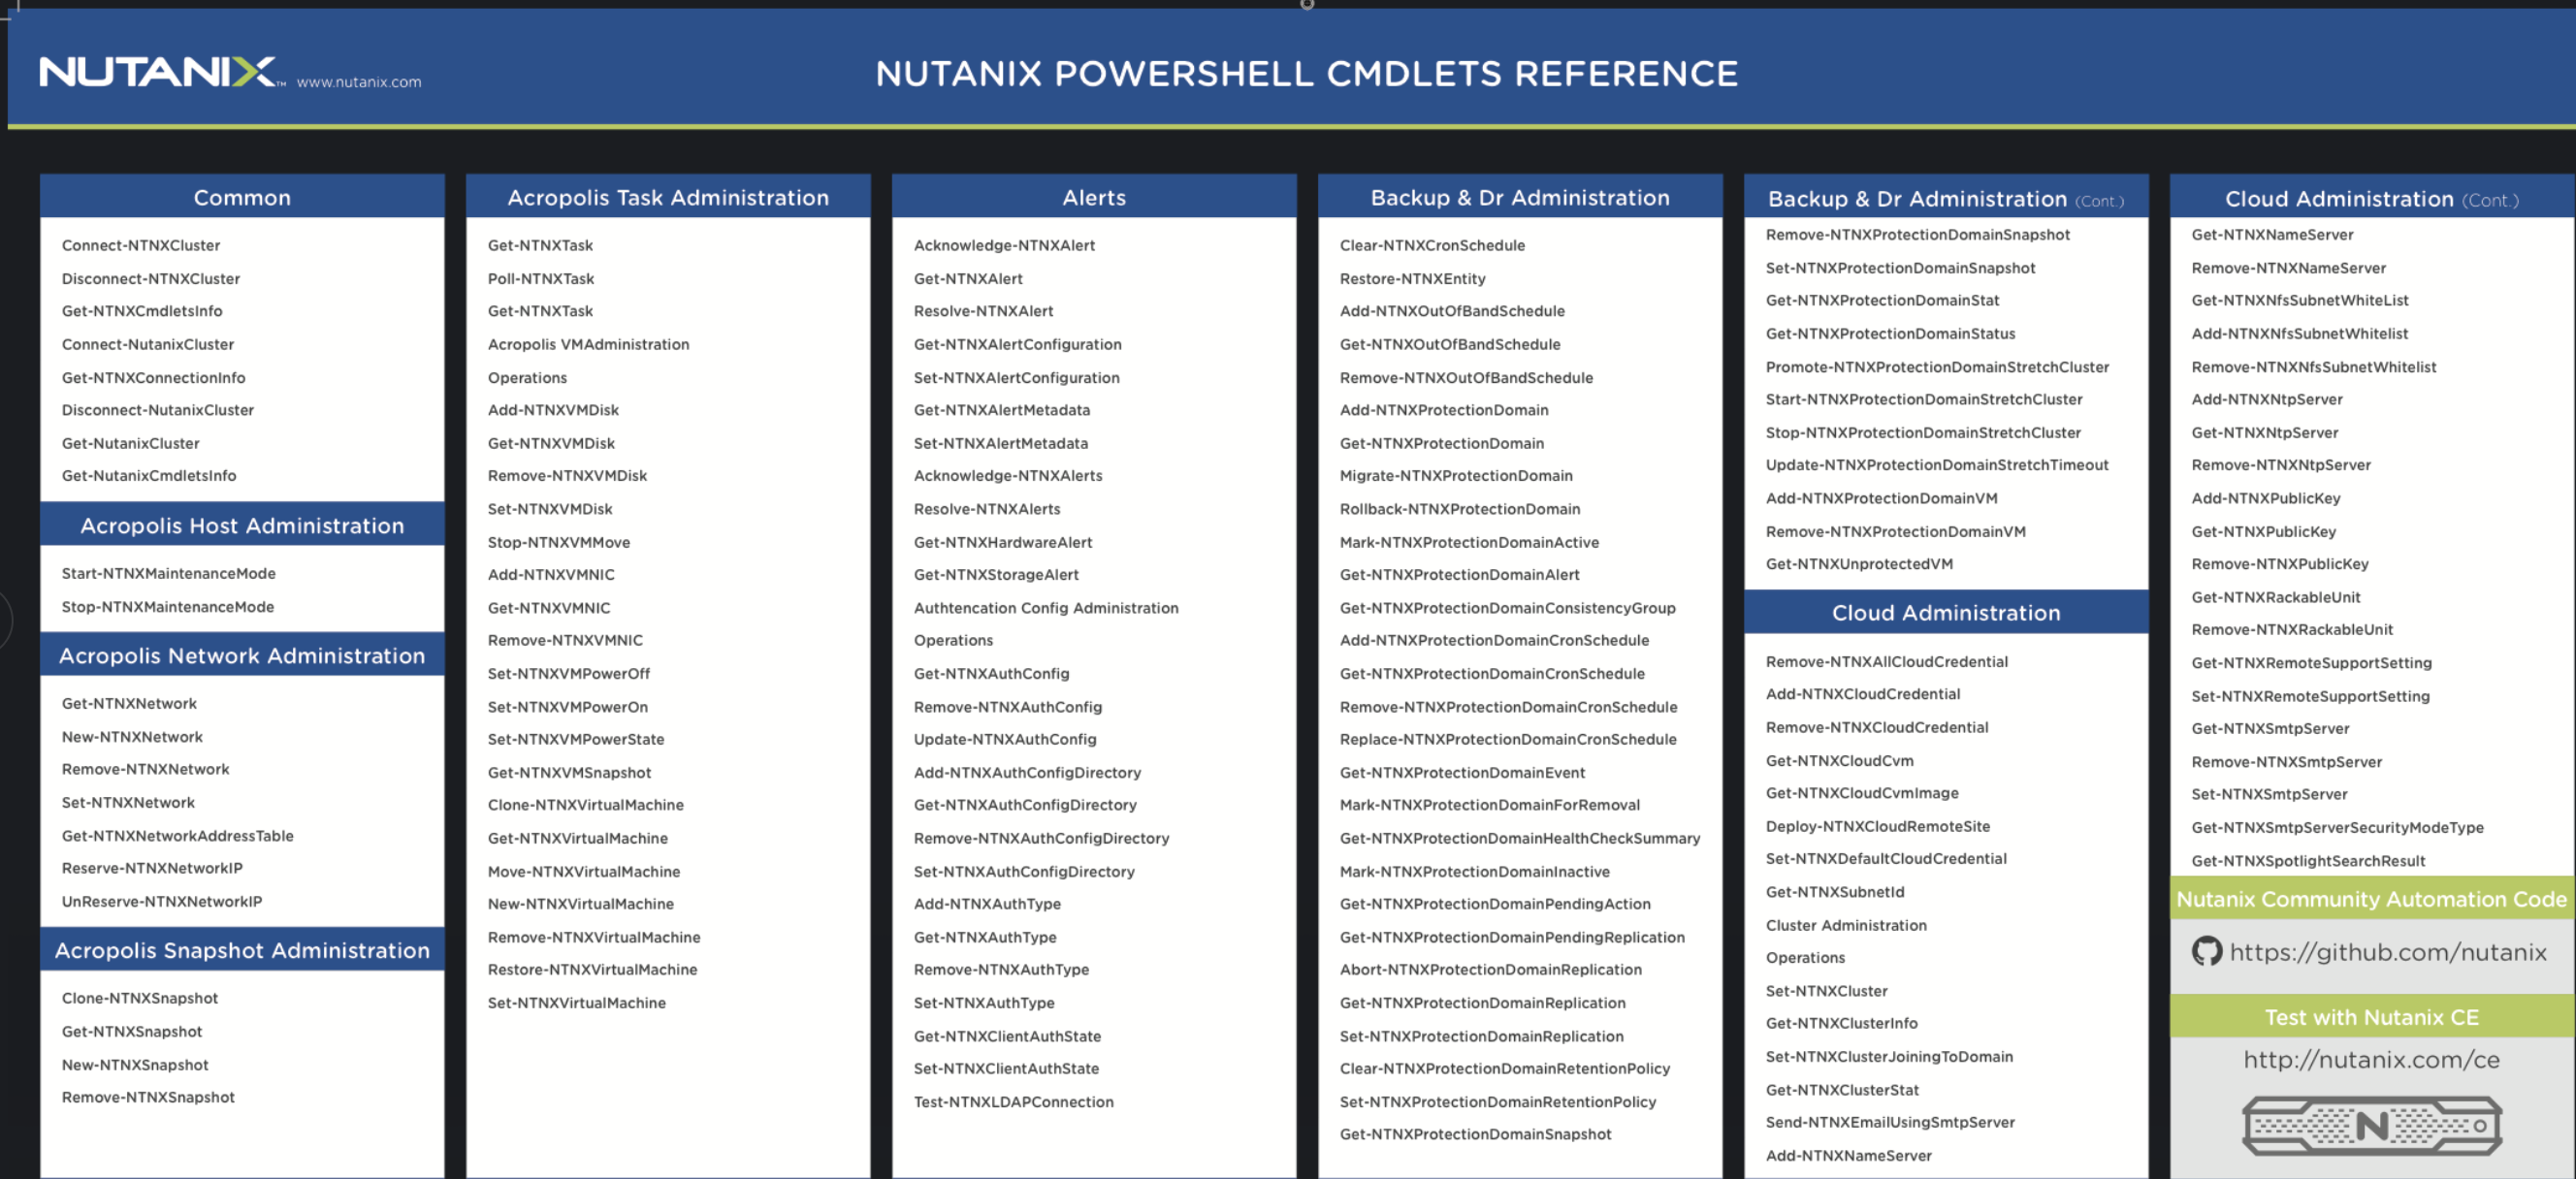
To update a VM's specs, we need to send an HTTP PUT request to the Prism Central IP. The request\u00a0body<\/strong>\u00a0should contain all current specs of the VM. The easiest way to get a VM's specs is to send a GET request to \/vms\/uuid<\/strong><\/a><\/p> Now in the below output of GET operation,\u00a0Scroll down to the\u00a0Response Body<\/strong>\u00a0text box. Find the\u00a0spec\u00a0key and copy starting from \"spec<\/strong>\" down to the last closing curly brace \"}\". Paste it to a text editor.<\/p> For eg-<\/p> \u00a0<\/p> Now, you can update any parameter in the above, you power on a VM, update its\u00a0configuration, add new disk etc. \u00a0<\/p> or\u00a0another way is by using the Powershell scripts:<\/p> Here is a list of entities which you can manage using PowerShell CMDlets:\u00a0https:\/\/portal.nutanix.com\/page\/documents\/details?targetId=API_Ref-Acr_v4_6%3APowerShell_Cmdlets_Reference<\/a><\/p> \u00a0<\/p> Also, this\u00a0PowerShell CMDlets cheatsheet would\u00a0be useful: \u00a0<\/p> You can check out the Powershell commands under\u00a0Acropolis Task administration(2nd column in the above screenshot)<\/strong>\u00a0to create a new VM, Power it on etc,<\/p> \u00a0<\/p>","className":"post__content__best_answer"}">{
\"spec\": {
\"cluster_reference\": {
\"kind\": \"cluster\",
\"name\": \"Prolix\",
\"uuid\": \"00052c80-729d-8705-0000-0000000051fa\"
},
\"description\": \"v3api_vm\",
\"resources\": {
\"vnuma_config\": {
\"num_vnuma_nodes\": 0
},
\"nic_list\": [
{
\"ip_endpoint_list\": [],
\"nic_type\": \"NORMAL_NIC\",
\"subnet_reference\": {
\"kind\": \"subnet\",
\"name\": \"vlan25\",
\"uuid\": \"565784d2-7a68-4a16-a1bd-92473760f607\"
},
\"uuid\": \"4bff96c1-386e-40bb-bc5b-1dc8a85952af\",
\"mac_address\": \"50:6b:8d:b4:76:12\"
}
],
\"num_vcpus_per_socket\": 2,
\"num_sockets\": 1,
\"gpu_list\": [],
\"memory_size_mib\": 4096,
\"power_state\": \"OFF\",
\"hardware_clock_timezone\": \"UTC\",
\"power_state_mechanism\": {
\"mechanism\": \"HARD\"
},
\"vga_console_enabled\": true,
\"disk_list\": [
{
\"device_properties\": {
\"disk_address\": {
\"device_index\": 1,
\"adapter_type\": \"SCSI\"
},
\"device_type\": \"DISK\"
},
\"uuid\": \"948915d8-1f99-46f3-a249-39151f3f518a\",
\"disk_size_bytes\": 26484932608,
\"disk_size_mib\": 25258
}
]
},
\"name\": \"nuran_v3api\"
},
\"api_version\": \"3.1\",
\"metadata\": {
\"last_update_time\": \"2018-11-03T00:26:41Z\",
\"kind\": \"vm\",
\"uuid\": \"042dada0-2f55-4001-a6f1-70d7b88e323c\",
\"project_reference\": {
\"kind\": \"project\",
\"name\": \"default\",
\"uuid\": \"f86d420a-f601-4ca9-9135-082bc38554c6\"
},
\"spec_version\": 1,
\"creation_time\": \"2018-11-02T20:42:52Z\",
\"owner_reference\": {
\"kind\": \"user\",
\"uuid\": \"00000000-0000-0000-0000-000000000000\",
\"name\": \"admin\"
},
\"categories\": {}
}
}<\/code><\/pre>
\u00a0<\/p>
\u00a0<\/p> <\/figure>